OTM can generate outbound XML data for any business object — Order Release, Shipment, Invoice, and more — and send it to an external system such as a carrier platform, ERP, or middleware. This can be triggered manually using the Send Interface Transmission action, or automatically from an OTM Agent (workflow). OTM Agents are covered in a later topic.
There are three things you need to set up before OTM can send outbound data:
Step by Step — Configure OTM Outbound Integration:
Navigate to:
Business Process Automation > Power Data > Integration > Out XML Profiles
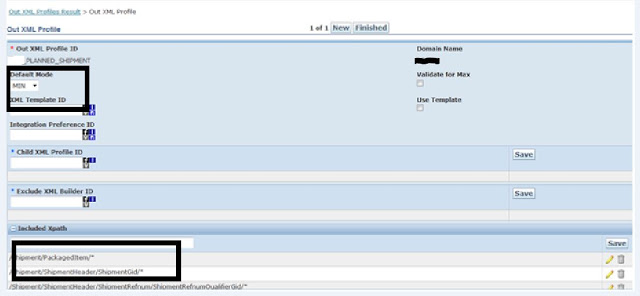
Create a new profile and set Default Mode to MIN. Then add XPath expressions for each field you want to include in the outbound XML. Using MIN mode means OTM only outputs the fields you explicitly list — everything else is excluded. This keeps the XML compact and relevant to the receiving system.
Navigate to:
Business Process Automation > Communication Management > External Systems
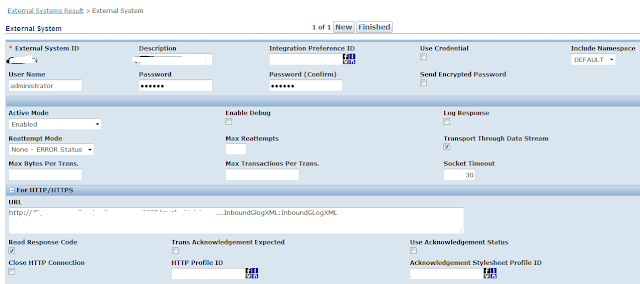
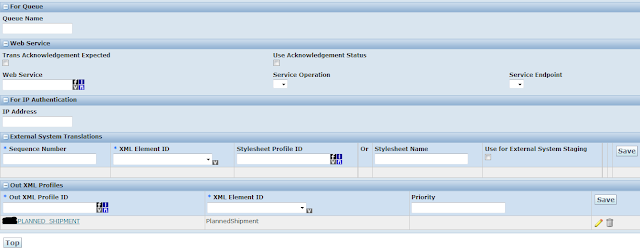
Create a new External System record and fill in the following fields:
To test the setup or trigger a one-off outbound send, open the object you want to send (e.g. a Shipment) and navigate to:
Shipment > Actions > Utilities > Send Interface Transmission
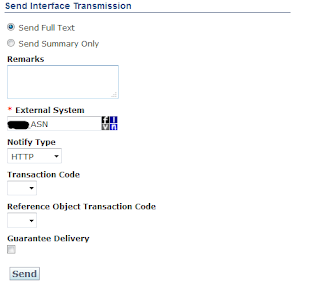
Select the External System defined in Step 2 and choose the appropriate notification type — HTTP for a direct URL post, or Service for a web service call. Click Send.
Navigate to:
Business Process Automation > Integration > Transmission Manager > Transactions Tab
Enter the Object GID in the Object field and search. OTM displays the Transmission Result. Click Raw XML to view the actual XML that was generated and sent to the external system.
Configuring a Web Service for the External System:
If your external system exposes a SOAP web service endpoint (common with middleware platforms such as Oracle SOA/BPEL), you need to register that web service in OTM and link it to the External System. This is an alternative to the simple HTTP POST URL approach — use it when the receiving system requires a WSDL-based service call.
Navigate to:
Business Process Automation > Communication Management > Web Services
Click New.
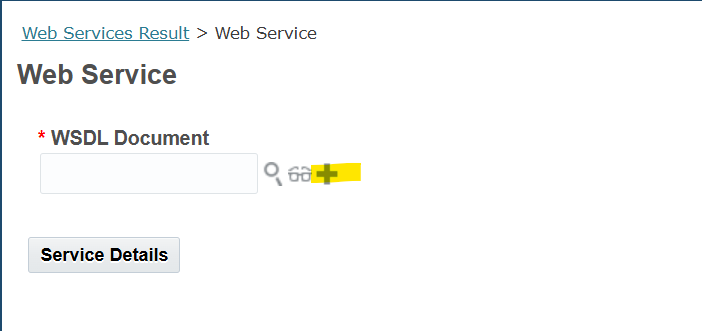
On the new Web Service form, click + next to the WSDL Document field to upload the WSDL file. You will be prompted to enter a Document Type and Content Management System.
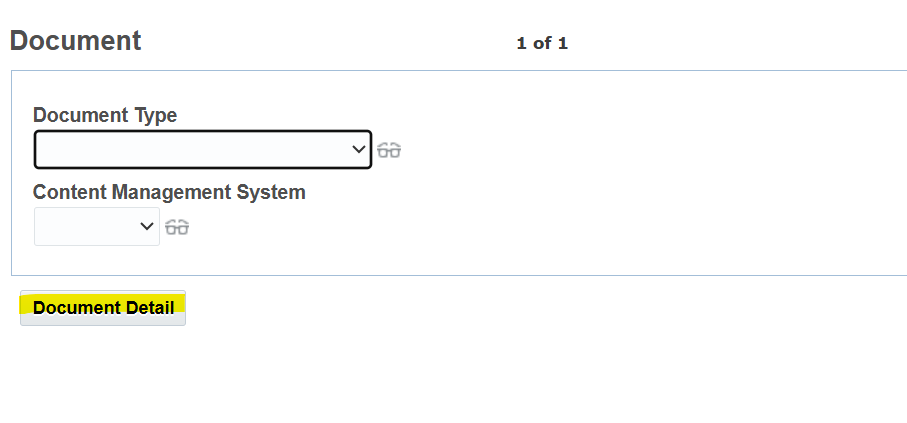
Click Document Detail. Enter a Document ID (e.g. YOUR_WEBSERVICE_WSDL) and click Upload to upload the WSDL file provided by your middleware team. Click Finished.
Back on the Web Service form, click Service Details. OTM reads the uploaded WSDL file and automatically populates the Service Name, Namespace, Port Name, SOAP Encoding, and Operations.
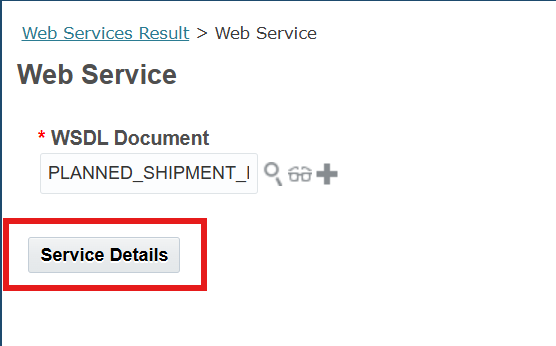
Enter a Service ID and click Finished. The Service ID is how you will reference this web service from the External System.
Navigate to:
Business Process Automation > Communication Management > External Systems
Click New. Enter an External System ID and click Finished.
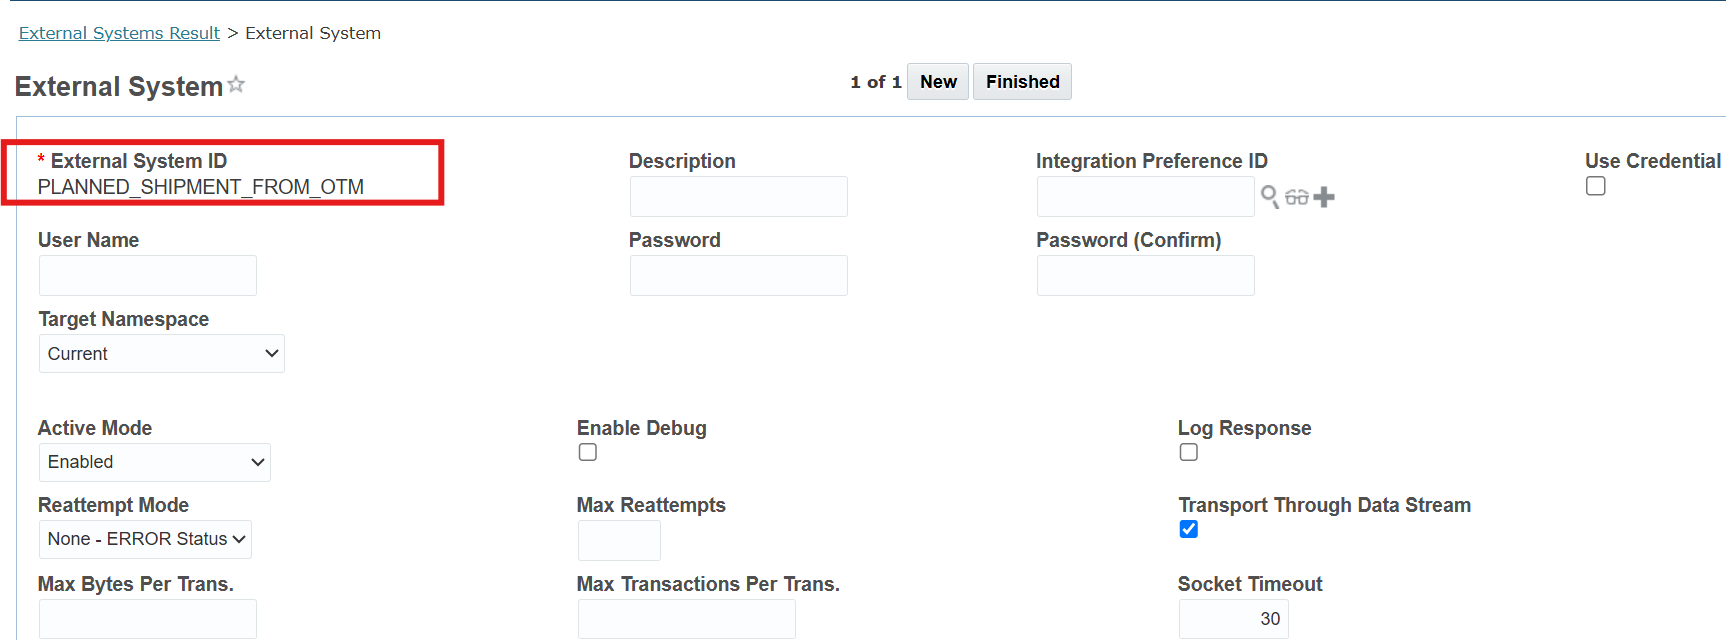
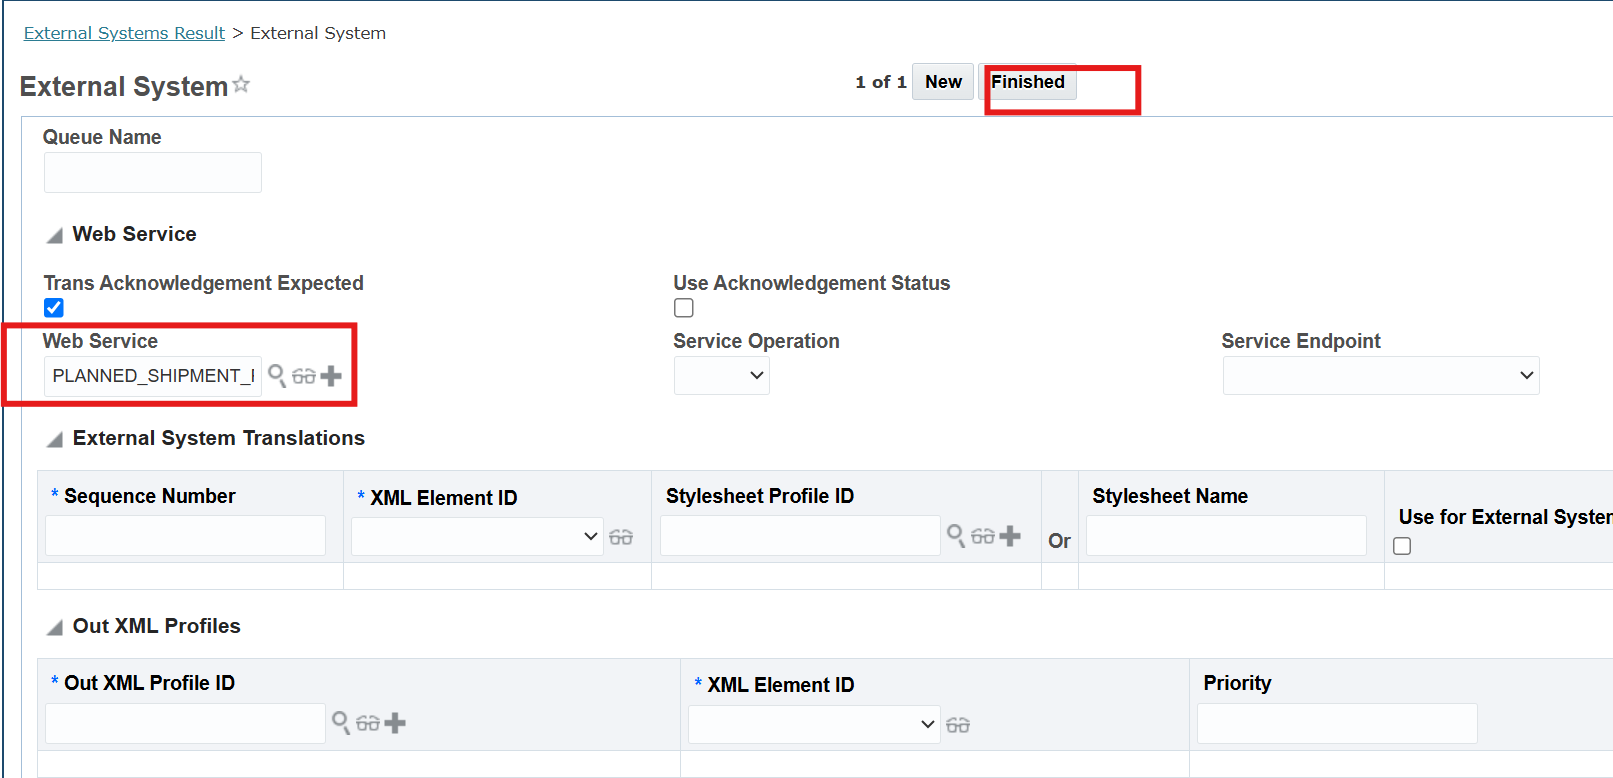
Open the External System again. Navigate to the Web Service section and enter the Web Service ID you created in Step B. Click Finished.
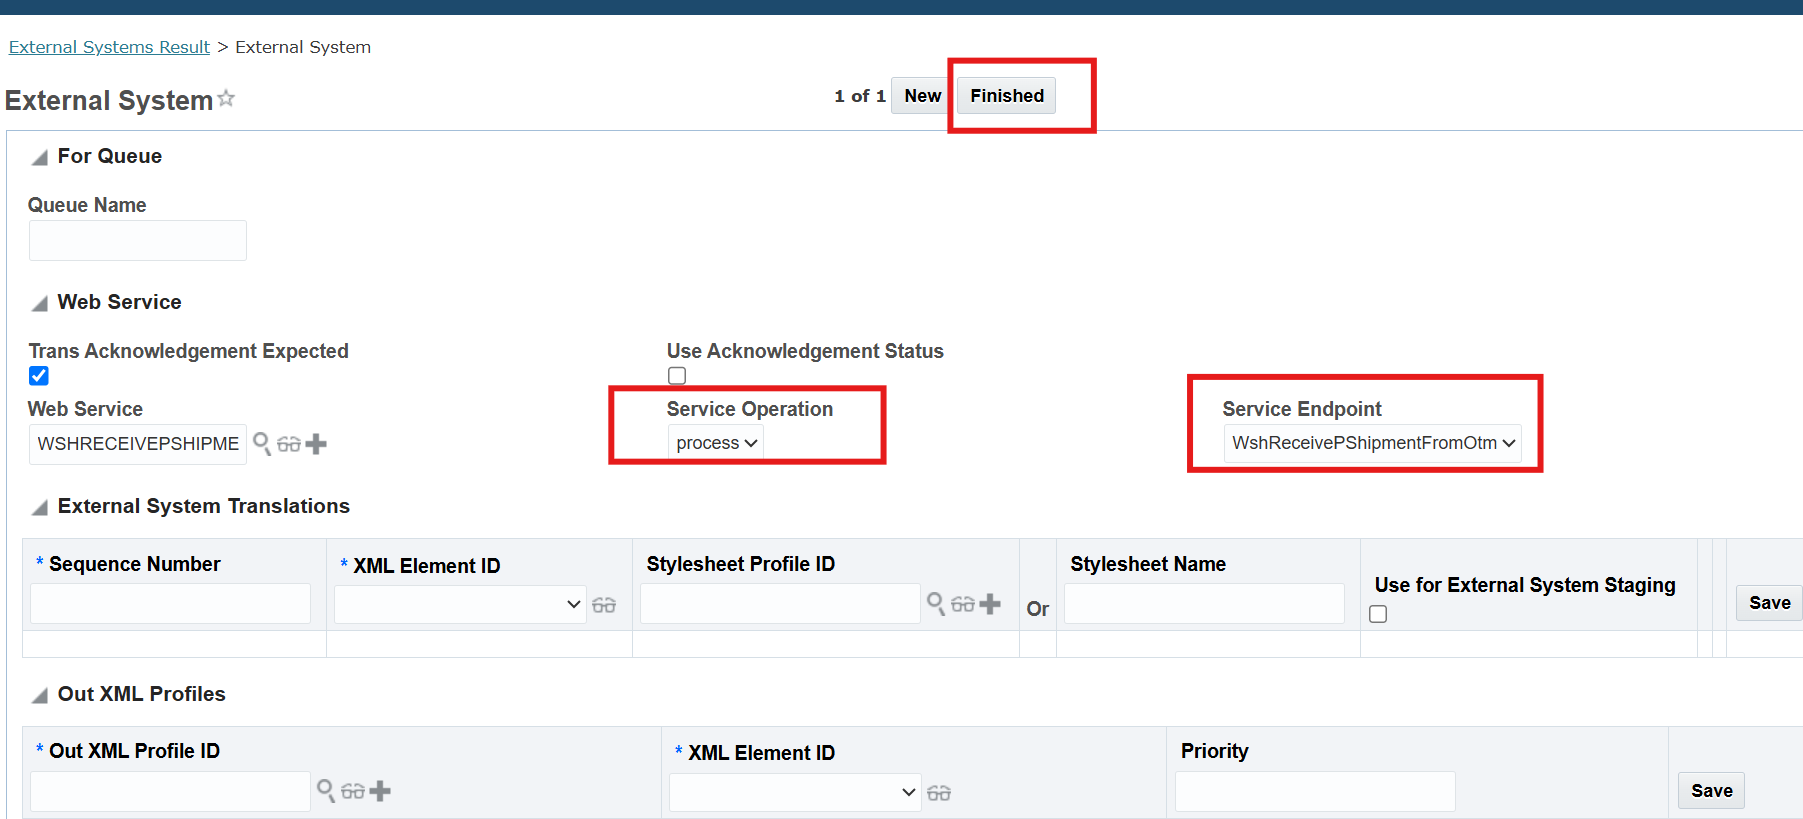
Open the External System once more and set the Service Operation and Service Endpoint dropdowns — these are populated from the WSDL. Click Finished.
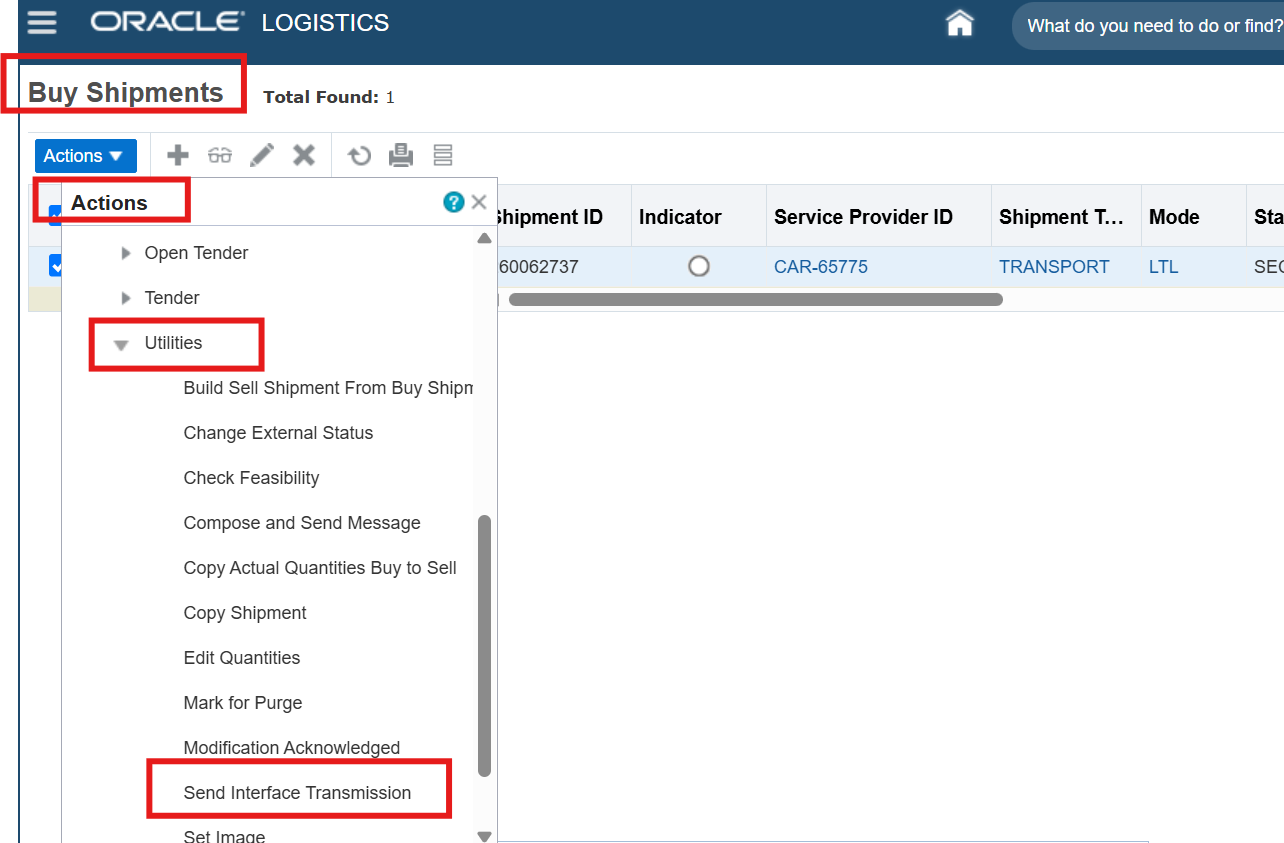
Open a test Shipment (or any object) and go to:
Actions > Utilities > Send Interface Transmission
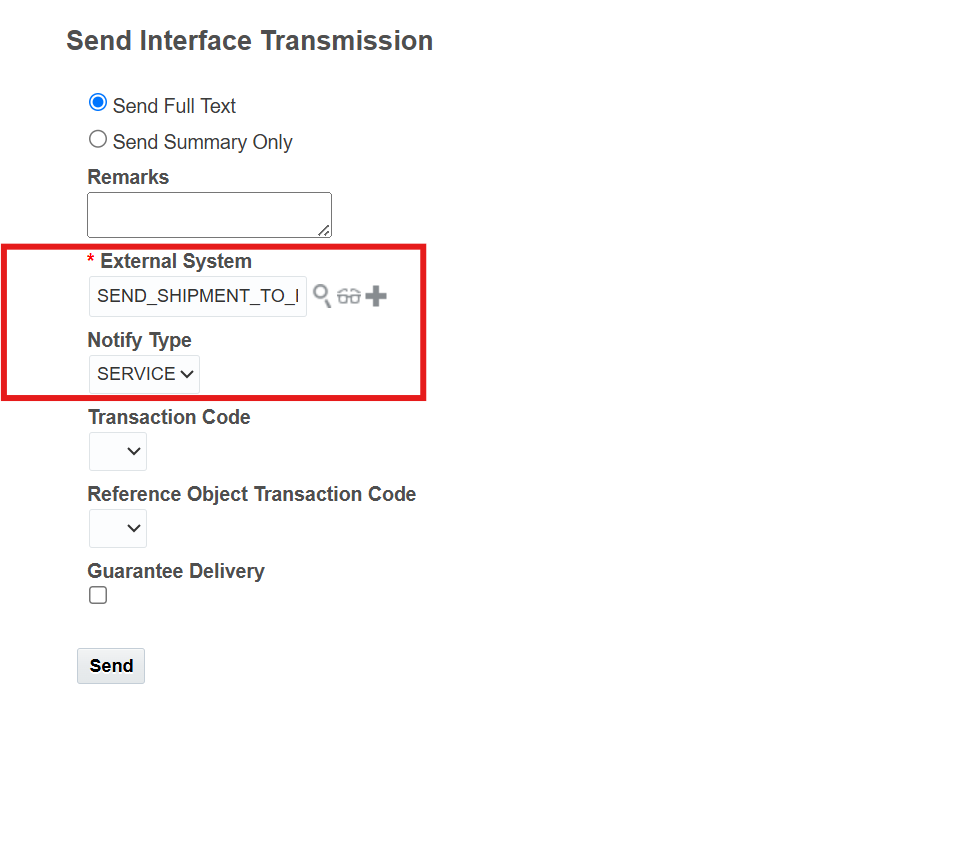
Enter the External System ID and set Notify Type to SERVICE. Click Send.
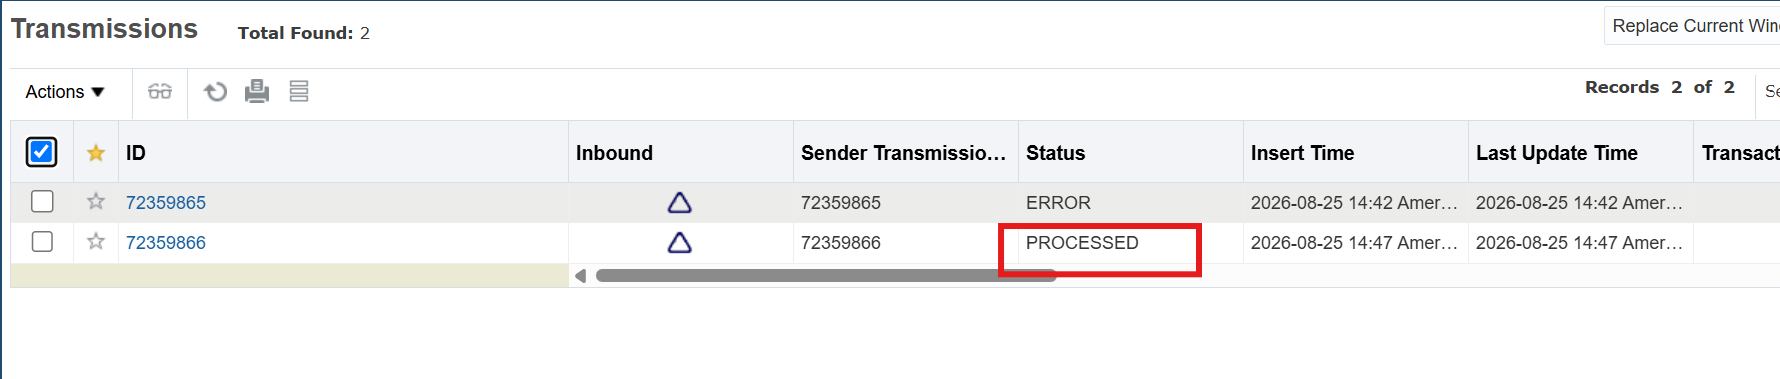
In the Transmission Manager, you should see the outbound transmission with status PROCESSED.
What’s Next:
The next topic covers OTM Domains, Standard Schema and Data Dictionary — foundational reference material that explains how OTM organises data across domains and where to find field-level documentation.
Next Topic: OTM Domains, Standard Schema and Data Dictionary