In OTM, you can develop a report with basic knowledge of SQL, PL/SQL, and Oracle BI Publisher. Report developers need to install Oracle BI Publisher Desktop from the Oracle Technology Network.
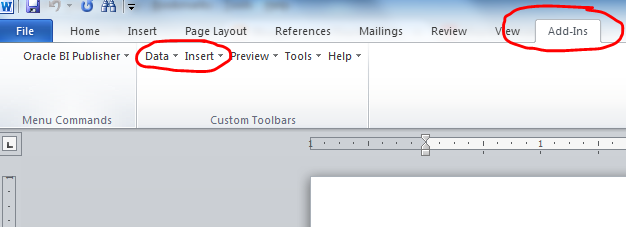
Once BI Publisher is installed, a Word document menu appears with an ‘Add-Ins’ option:
The report development steps for a typical BI Publisher report in OTM are:
- A PL/SQL Package in REPORTOWNER schema to dynamically build WHERE clause condition strings based on report input parameters
- A Query Template with SQL query and XML elements for each output column
- A Format Template to display the XML elements from the Query Template in the required format
- A Report Definition in OTM with input parameter names, data types, and links to the query and format templates
The steps below use a simple example: a report that queries salary details for a particular employee by employee number.
Step 1 — Create Sample Data
Login to the GLOGOWNER schema of the OTM database and create sample tables:
create table glogowner.emp(emp_no number,
emp_name varchar2(100)
);

create table glogowner.sal(emp_no number,
salary number,
month varchar2(100)
);

begin
insert into emp values(1,'Ram');
insert into emp values(2,'Aby');
insert into emp values(3,'Venkat');

insert into sal values(1,1000,'JAN');
insert into sal values(1,1100,'FEB');
insert into sal values(2,1200,'JAN');
insert into sal values(2,1300,'FEB');
insert into sal values(3,1400,'JAN');
insert into sal values(3,1500,'FEB');
commit;
end;
/
Step 2 — Write and Test the SQL Query
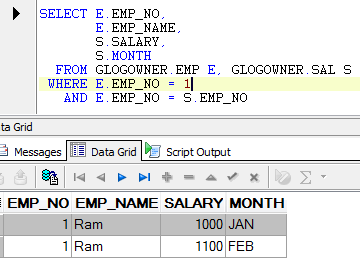
Note that passing the employee number to the query will be done from the report — treat it as an input parameter.
Step 3 — Create the PL/SQL Package in REPORTOWNER
Login to the REPORTOWNER schema of the OTM database and execute the following:
CREATE OR REPLACE PACKAGE REPORTOWNER.REPORT_EMP_PKG
IS
p_emp_no VARCHAR2 (200);
p_emp_no_param VARCHAR2 (200);
p_gl_user VARCHAR2 (128);
FUNCTION afterpform
RETURN BOOLEAN;
FUNCTION value_entered (lex_name IN VARCHAR2)
RETURN BOOLEAN;
END;
/

CREATE OR REPLACE PACKAGE BODY REPORTOWNER.REPORT_EMP_PKG
IS
FUNCTION afterpform
RETURN BOOLEAN
IS
v_string VARCHAR2 (32750);
v_boolean BOOLEAN;
BEGIN
reports_library.set_vpd (p_gl_user);

IF value_entered (p_emp_no)
THEN
p_emp_no_param := ' E.EMP_NO ' || '' || REPORTS_LIBRARY.GET_FILTER_CONDITION(p_emp_no) || '';
ELSE
p_emp_no_param := ' AND 1=1';
END IF;

RETURN (TRUE);
END afterpform;

FUNCTION value_entered (lex_name IN VARCHAR2)
RETURN BOOLEAN
IS
BEGIN
IF lex_name > ' ' AND lex_name <> '1=1' AND lex_name IS NOT NULL
THEN
RETURN (TRUE);
ELSE
RETURN (FALSE);
END IF;
END value_entered;

END;
/

CREATE OR REPLACE PUBLIC SYNONYM REPORT_EMP_PKG FOR reportowner.REPORT_EMP_PKG;
Note that the package uses REPORTS_LIBRARY.GET_FILTER_CONDITION. This is a standard OTM API that accepts the report parameter (P_EMP_NO) and returns a WHERE clause condition string depending on whether the user selected ‘Equal to’, ‘Less Than’, etc:
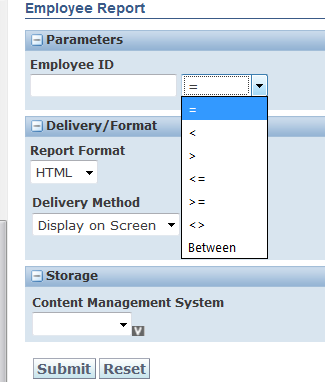
The variable p_emp_no_param is your WHERE clause parameter string, built by your PL/SQL code and passed to the SQL in the Query Template at run time.
Step 4 — Create the Query Template
Copy the following to a file with extension .xml:
<?xml version="1.0" encoding = 'UTF-8'?>
<dataTemplate name="REPORT_QUERY_TEMPLATE" defaultPackage="REPORT_EMP_PKG" version="1.0">
<properties>
<property name="xml_tag_case" value="upper"/>
<property name="debug_mode" value="on"/>
</properties>
<parameters>
<parameter name="P_GL_USER" dataType="character" defaultValue="DBA.ADMIN"/>
<parameter name="P_EMP_NO" dataType="character" defaultValue="1=1"/>
</parameters>
<dataQuery>
<sqlStatement name="QUERY_HDR">
<![CDATA[SELECT E.EMP_NO,
E.EMP_NAME,
S.SALARY,
S.MONTH
FROM GLOGOWNER.EMP E,
GLOGOWNER.SAL S
WHERE &P_EMP_NO_PARAM
AND E.EMP_NO=S.EMP_NO
]]>
</sqlStatement>
</dataQuery>
<dataTrigger name="afterParameterFormTrigger" source="REPORT_EMP_PKG.afterpform"/>
<dataStructure>
<element name="P_EMP_NO_PARAM" dataType="varchar2" value="REPORT_EMP_PKG.P_EMP_NO_PARAM"/>
<group name ="HEADER" source="QUERY_HDR">
<element name="EMP_NO" value="EMP_NO"/>
<element name="EMP_NAME" value="EMP_NAME"/>
<group name ="LINES" source="QUERY_HDR">
<element name="SALARY" value="SALARY"/>
<element name="MONTH" value="MONTH"/>
</group>
</group>
</dataStructure>
</dataTemplate>
Key points in this query template:
- The report package name in the first line must match the REPORTOWNER package defined above.
- The Parameters section must include
P_EMP_NO— parameter names must match those used in the report package and the report definition. - The SQL Statement uses
P_EMP_NO_PARAMin the WHERE clause; its value comes from the report package at run time. - The Data Structure groups query columns as Header and Line level elements that appear in the Format Template.
Upload to OTM:
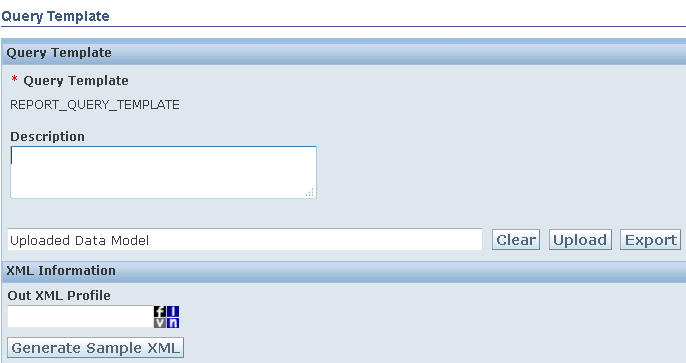
Give the template a name and click Upload to browse for the .xml file. Once uploaded, click ‘Generate Sample XML’:
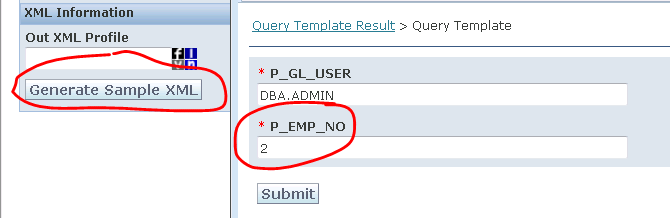
Enter an input parameter value (for example, employee number 2) to generate sample data. Save the sample XML file — it is used in the next step.
Step 5 — Create the Format Template
Create a new Word document named Report_Format_Template.rtf. Open it and load the sample XML:
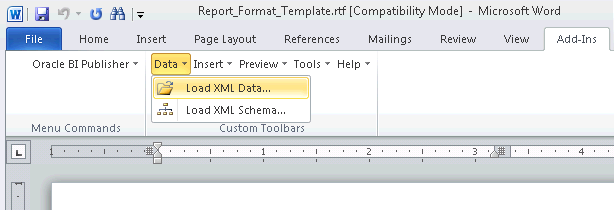
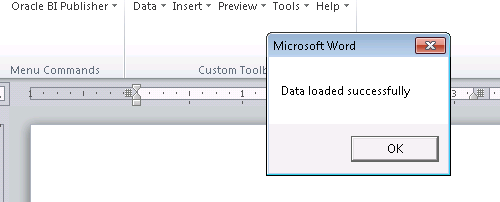
You will receive a confirmation message:
Once sample data is loaded, use the wizard to arrange columns:
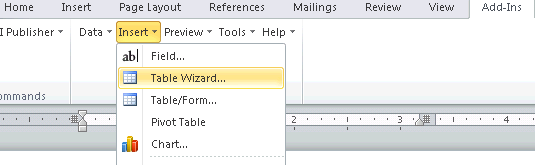
In the wizard:
- Report Format: Table
- Data set: Select one of the groups (Headers or Lines) defined in the Query Template Data Structure
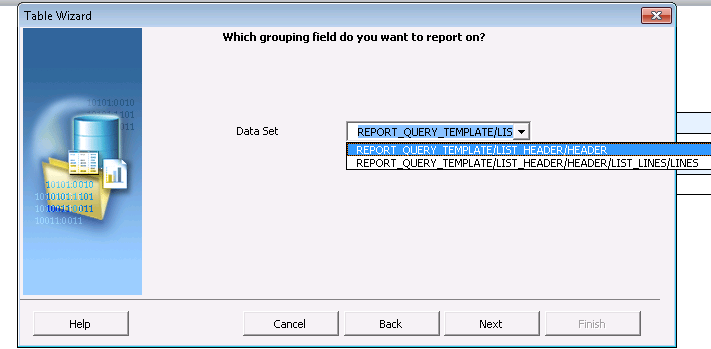
Select Headers (Emp Name and Number) first, then repeat for line-level elements (Month and Salary).
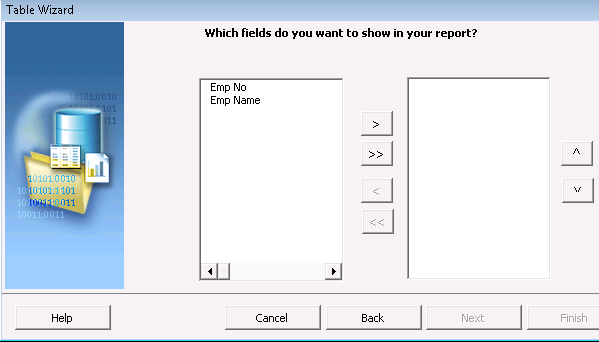
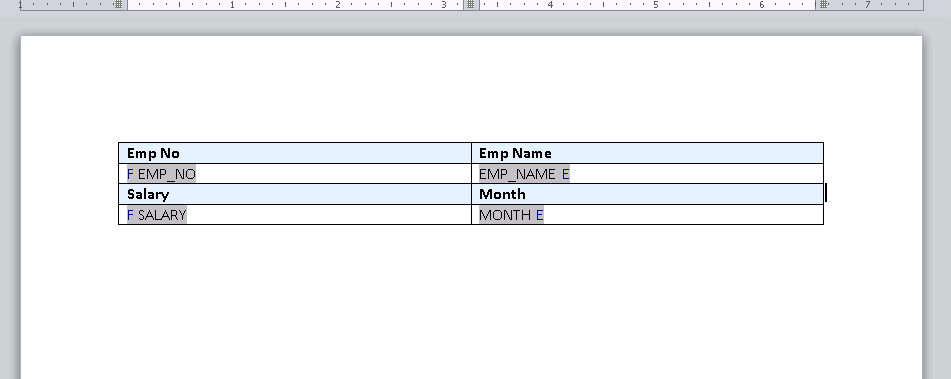
Select Group By and Sort By elements (optional) and click ‘Finish’. After repeating for line-level elements, the format looks like this:
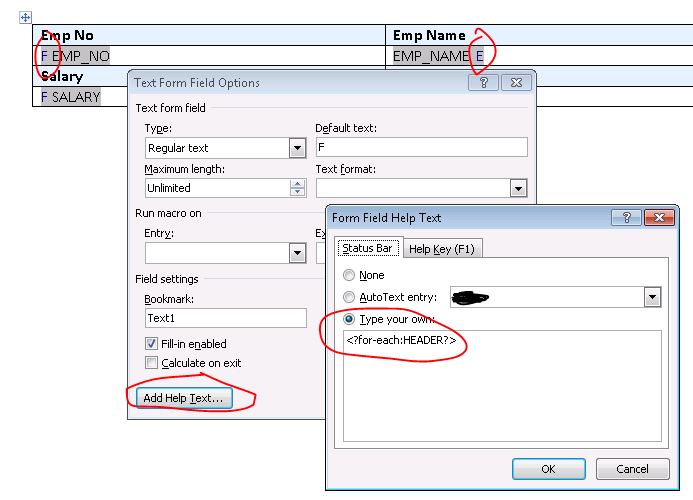
Double-clicking an element like EMP_NO shows its definition:
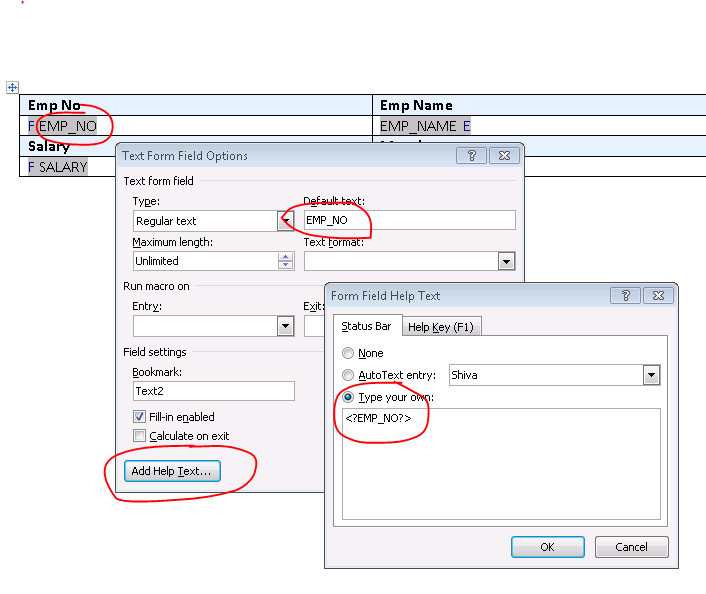
‘F’ marks the beginning of a loop for a group:
‘E’ marks the end of the loop for that group:
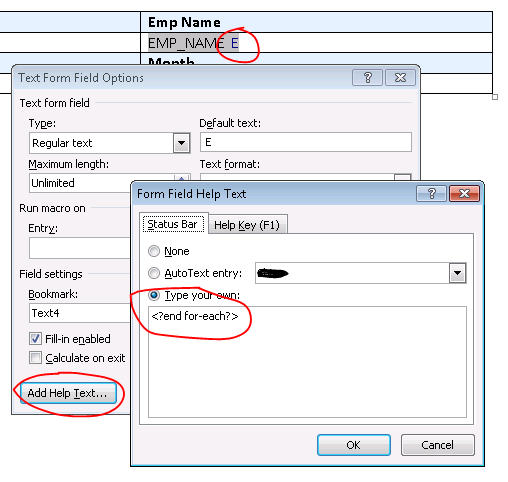
These markers are useful when manually arranging elements without the wizard. Save the RTF file and upload to OTM:
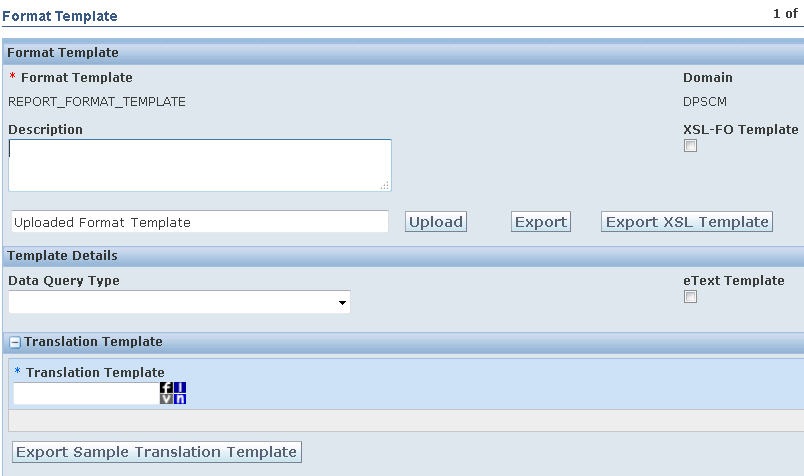
Give the template a name and upload the .rtf file.
Step 6 — Define the Report in OTM
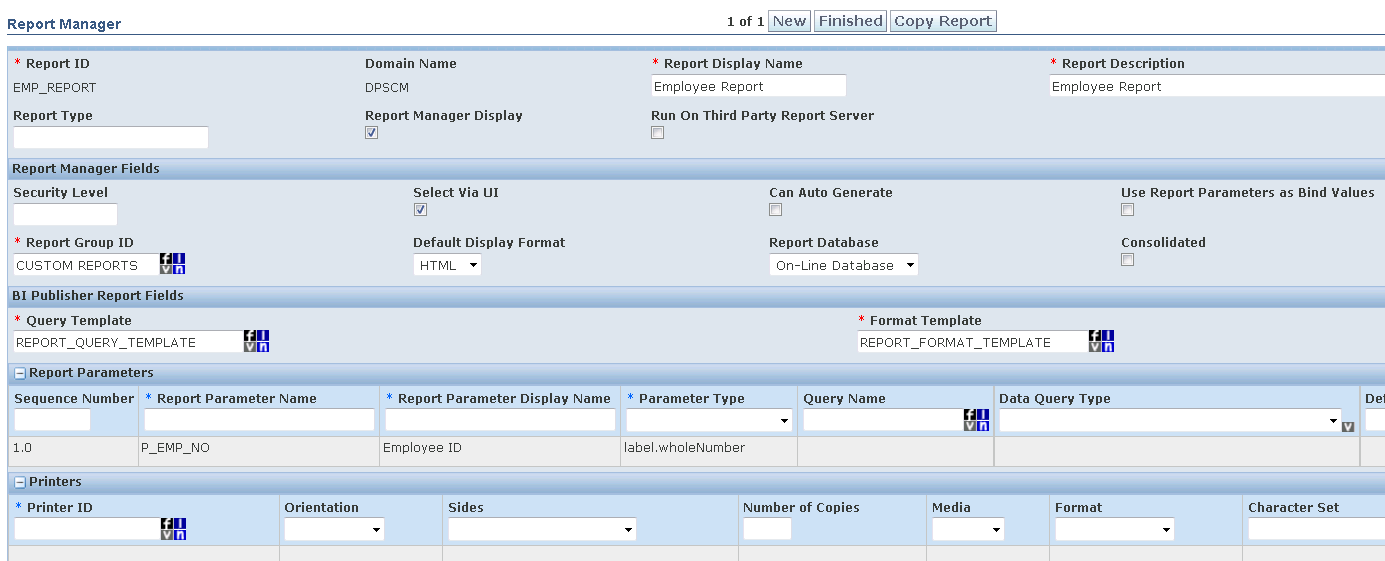
Specify:
- Report ID, Report Display Name, and Description
- Query Template and Format Template names from previous steps
- Check ‘Report Manager Display’
- Check ‘Select via UI’
- Uncheck ‘Use report parameters as Bind values’
- Create a new report group (for example: Custom Reports)
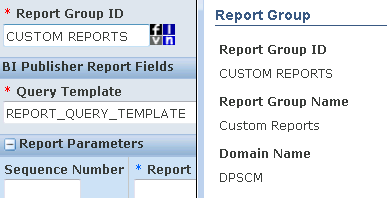
Define parameter name P_EMP_NO (must match the name in the query template and report package). Select the data type — number, character, etc. Standard object types like Buy Shipment can also be used as input parameters:

Check ‘mandatory’ if required, then click ‘Finished’ to save.
Running the Report
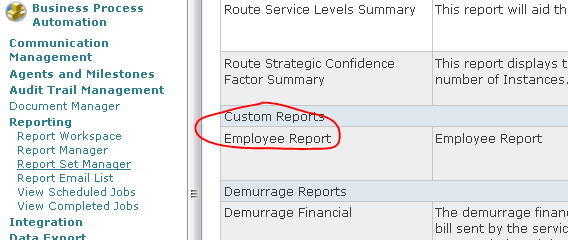
Enter input parameters:
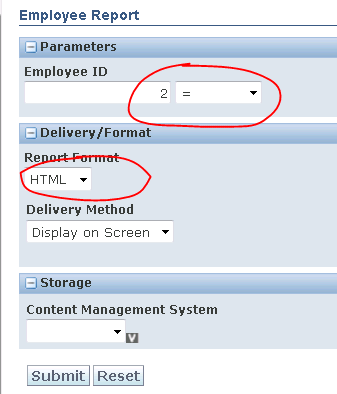
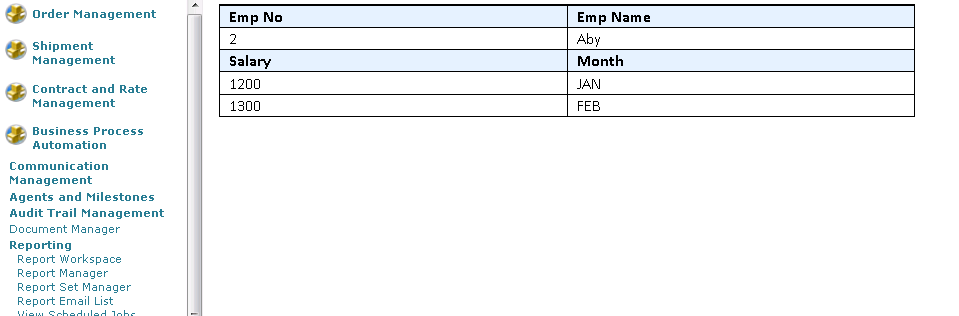
Click Submit. The report engine invokes the report package, which builds the WHERE clause parameter. The parameter is passed to the SQL query in the query template. The query executes, and the output is mapped to XML elements in the data structure. That XML data is passed to the format template and displayed as report output.
Once defined, you can automate the report to send output to a specific email address based on events, or configure a report workspace with a set of reports and attach it to a user role. These configurations are covered in separate posts.